Omega - Multi Facebook Pixels New Interface
New Interface Settings
⭐️ Installation
Step 1: Log into your Shopify account in App Store. Click the ADD APP button to buy the app for your store.
Step 2: You will then be redirected to your admin page to make a payment for the app and start installing.
Step 3: After clicking Install app, the app will be automatically installed and be ready right away for you to use in the Apps section
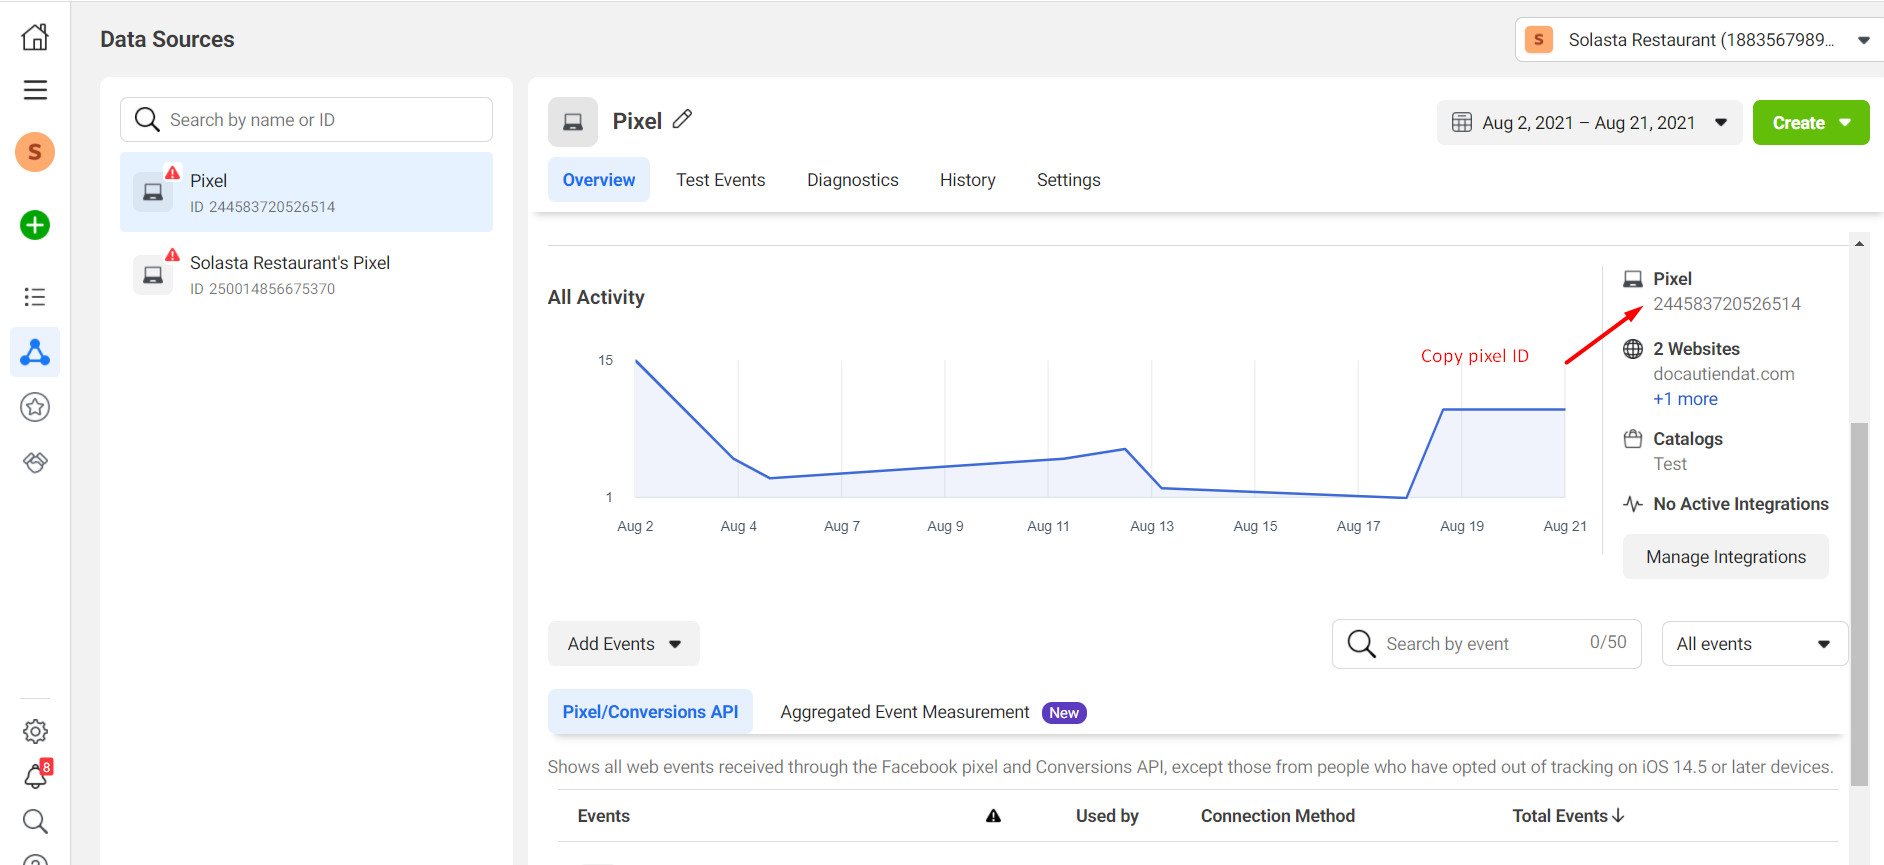
⭐️ How to add Pixel ID to your store
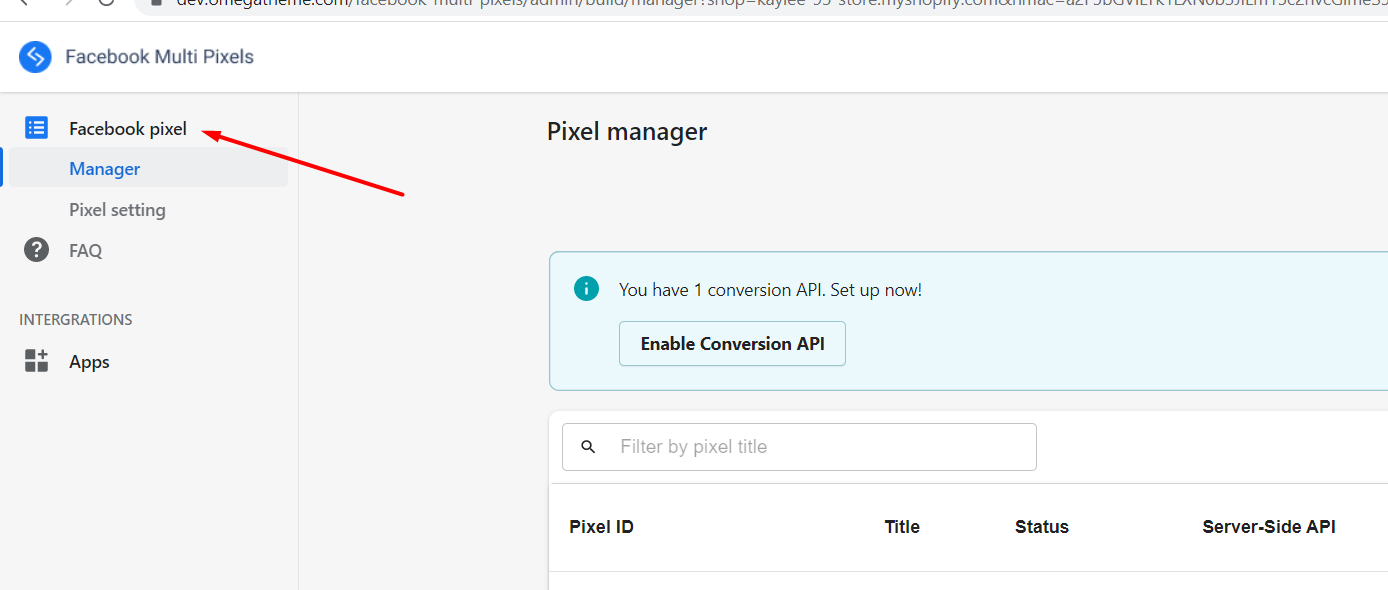
After installing Omega - Multi Facebook Pixels app you will be directed to the admin page
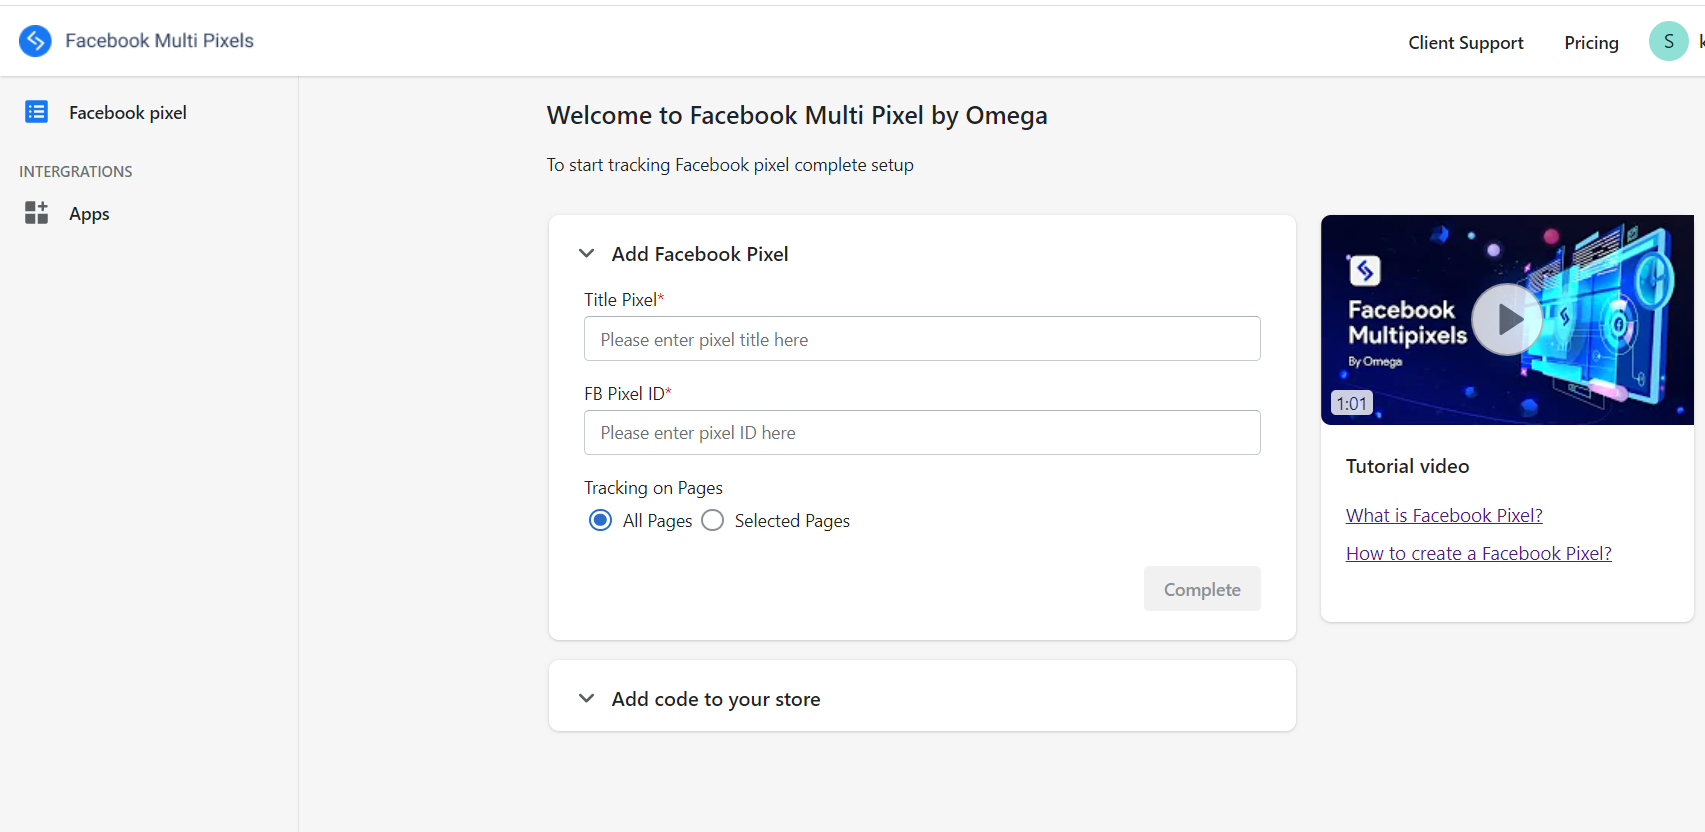
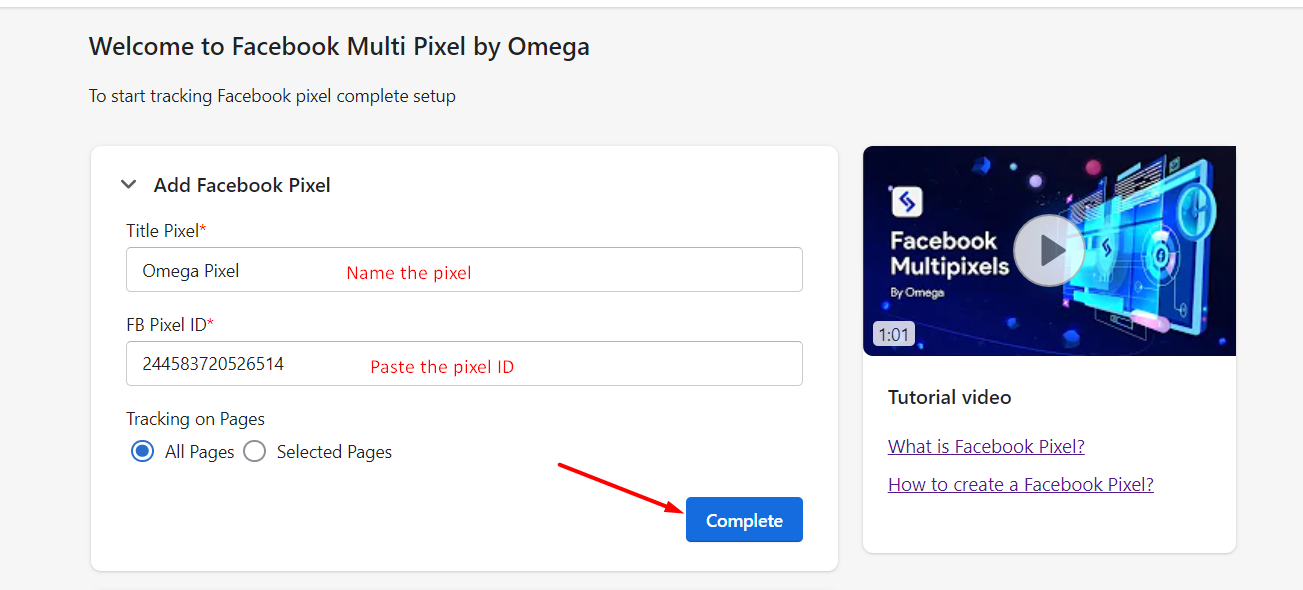
Step 2: Go back to the app, name the pixel and paste it on the blank cell
Step 3: Choose pages to track the pixel events
If you want the pixel to track all products, you can choose All Pages.
However, if you want the pixel to track only a specific Product, Collection, Product’s tag, and Product’s type, you can choose in the app by selecting Selected Pages
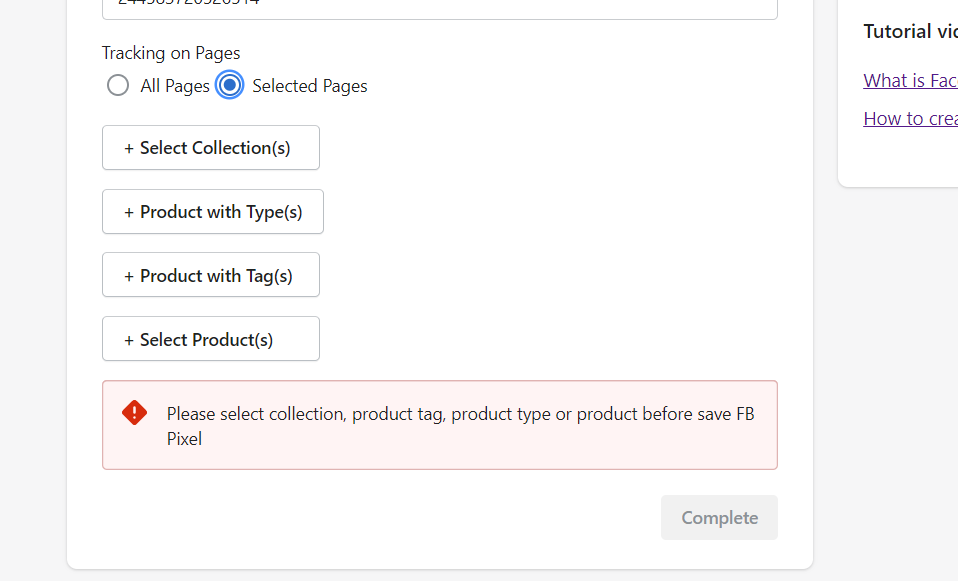
Step 4: Click Complete to continue
Step 5: After clicking Complete, you need to add the scripts to Shopify thank you page.
Copy the script from our app:
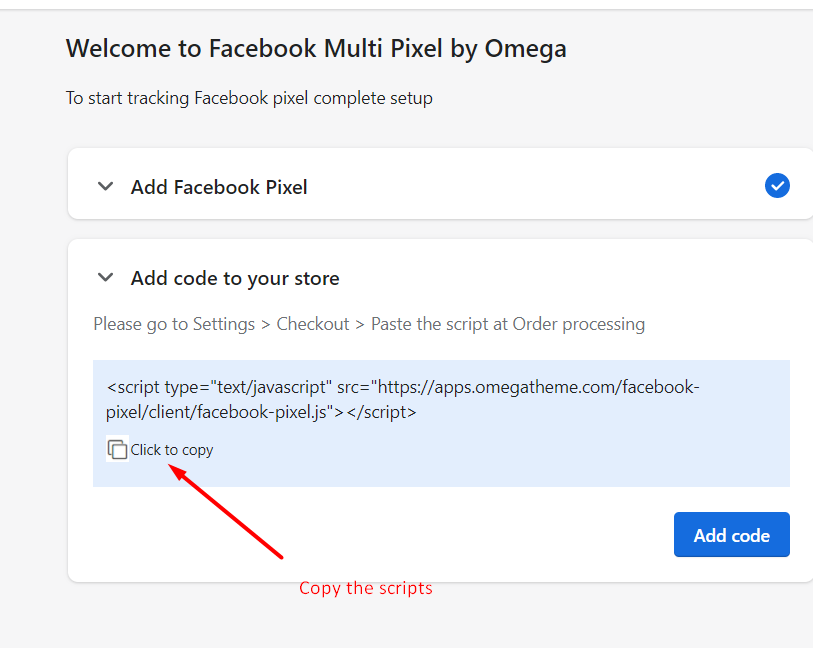
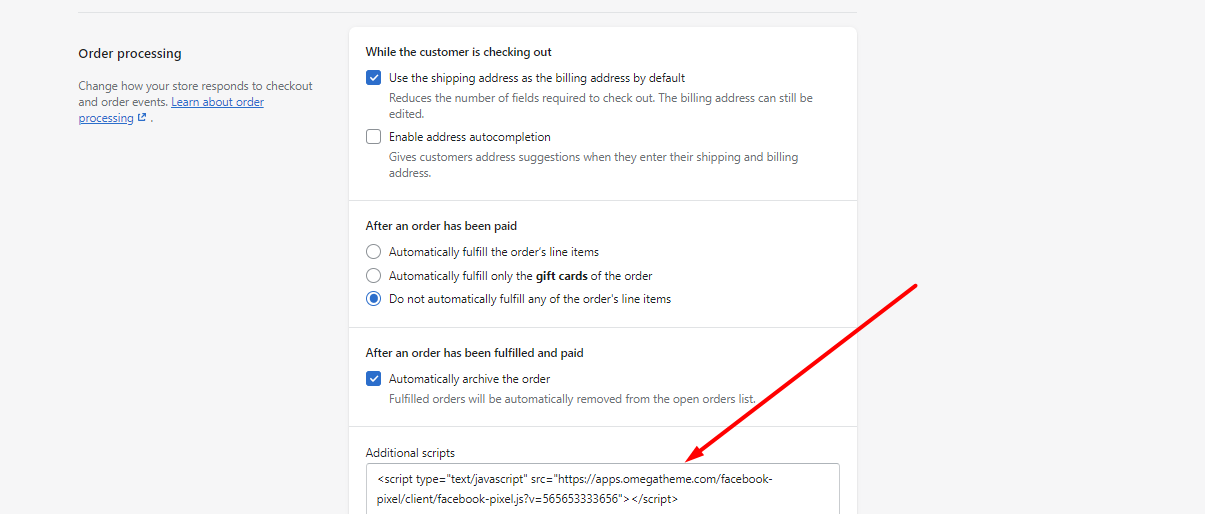
Click Add Code then the app will redirect you to Checkout, paste the code under additional scripts
Step 6: Click Complete setup and you can go to your store to check if it’s working
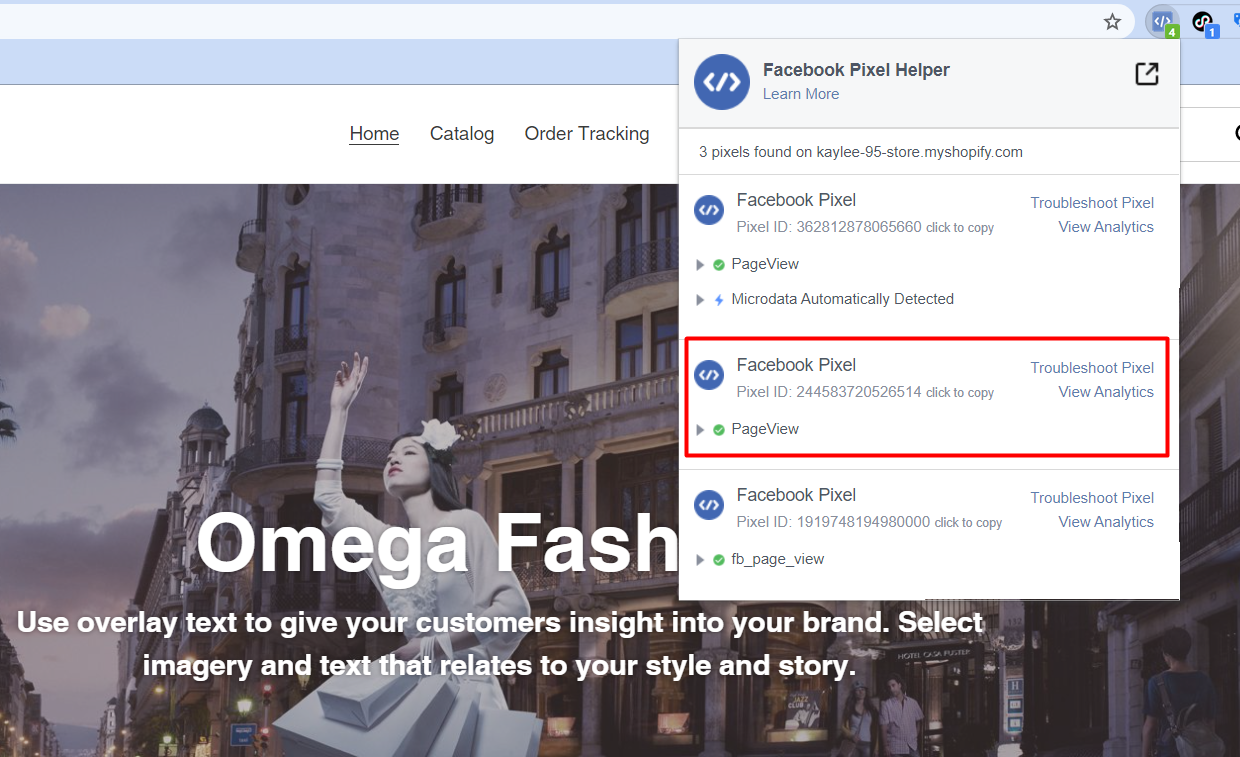
Use Facebook Pixel Helper to see if it’s working or not
⭐️ How to set up conversions API
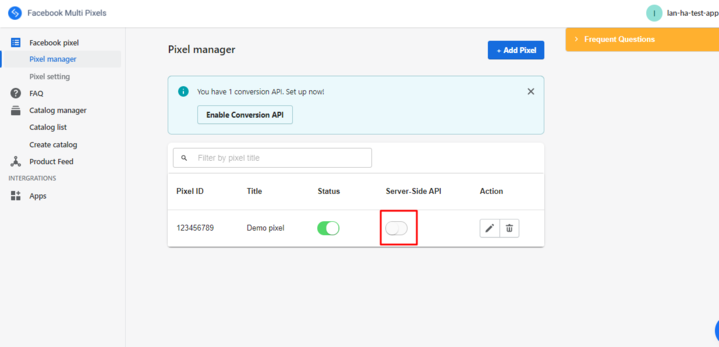
After clicking Complete setup, the app will show as below:
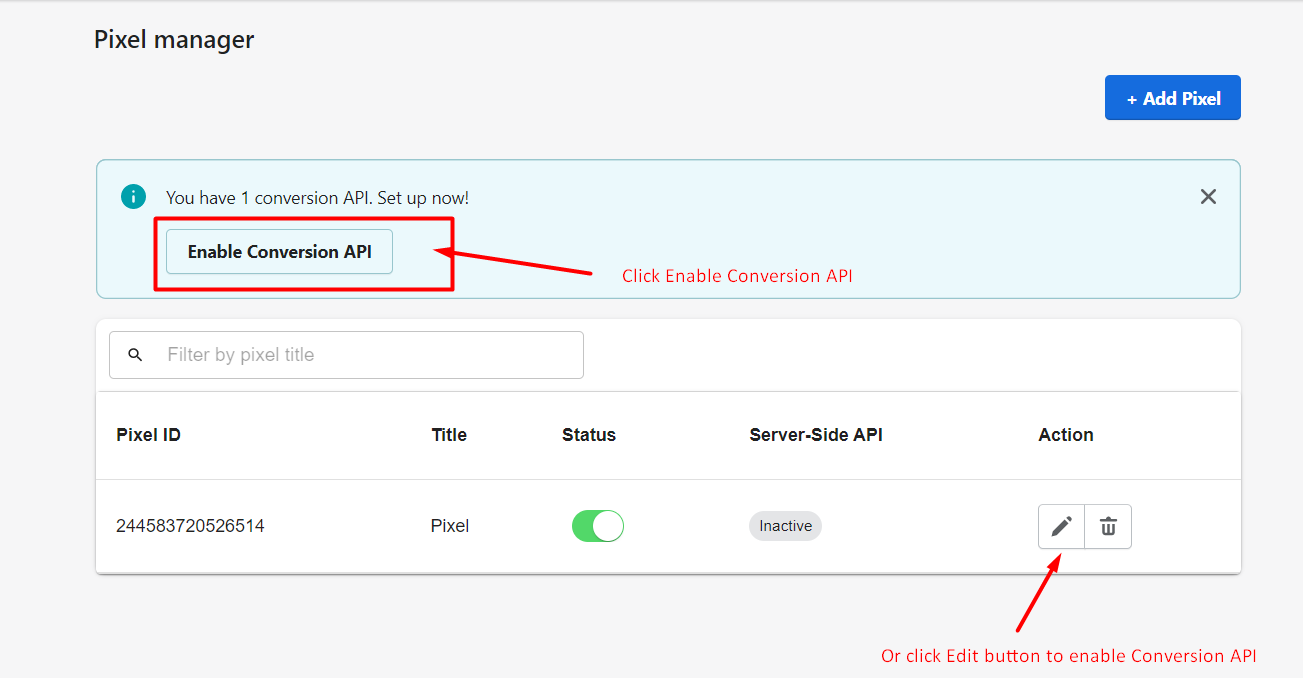
Due to IOS 14 updates, the users can choose to opt-out of tracking events, therefore, you will miss some events from the browser side, enable conversions API will help you track those missing events and keep the data tracking at maximum level.
You can either click Enable Conversion API:
Or Click the Edit button and enable the conversion API option:
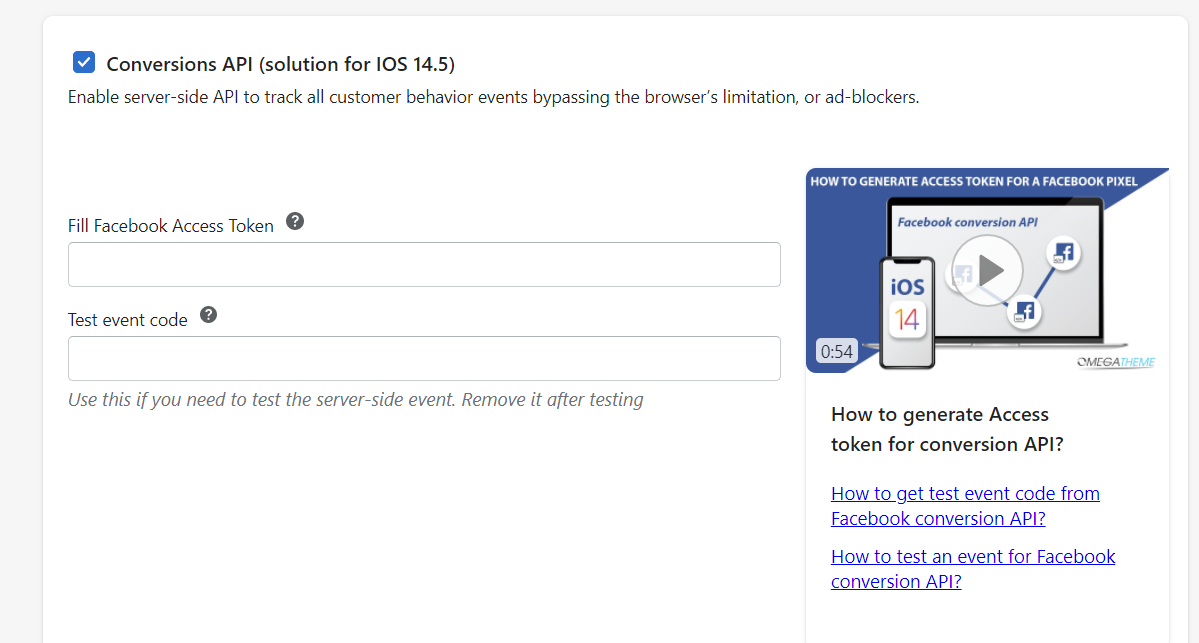
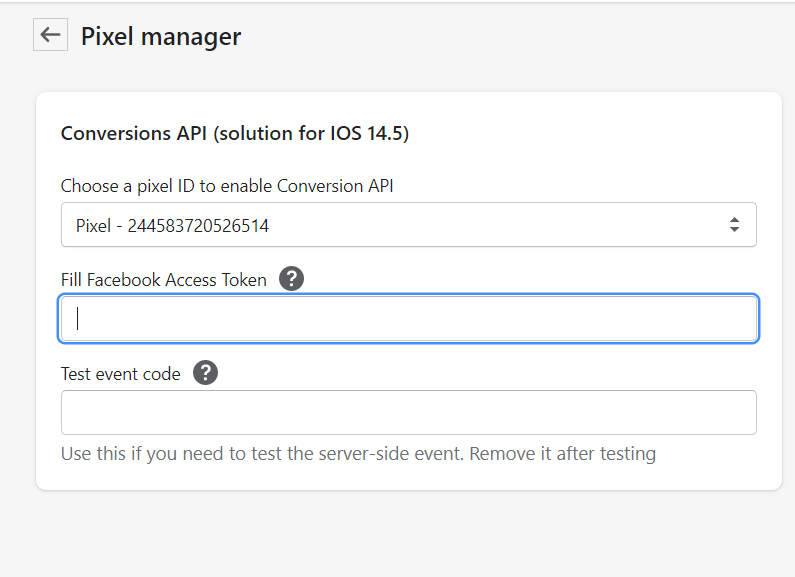
Fill in the access token and get a test event code to test the events on the server-side:
How to generate Facebook Access Token for a pixel
If you do not enable API, it will show Inactive API as below:
⭐️ Pixel Settings
You can see Pixel Settings under the Facebook Pixel section:
Then you can see the settings for your app and conversions API:
![]()
#1. You can disable/ enable the app
#2. Your Facebook Ads Account Time zone
By default, the app will use our server time zone, if you don't set up your time zone, there will be a slight difference in date reporting which causes Conversions API to report the data on the wrong date.
Make sure to set the time zone in the app to be the same as your ads account time zone.
You can check your Ads account time zone by following the below document:
https://www.facebook.com/business/help/754049591334898
#3. Settings for Conversions API
In this section, you can choose the events you want conversions API to track, normally it includes Page View, View Content, Add to cart, Initcheckout and Purchase event.
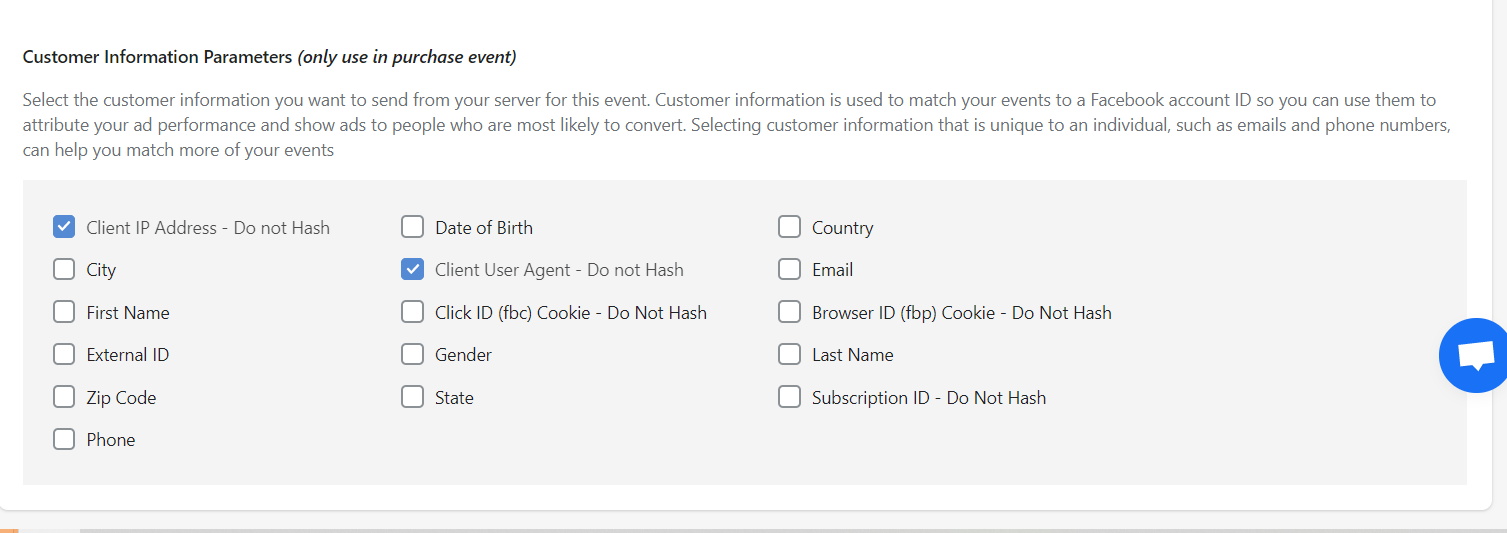
#4. Customer information Parameters
For the purchase event, you can get more customer details by selecting the customer information you want the pixel to send.
⭐️ How to Add Another Pixel
To add another pixel in the app, click Add Pixel button:

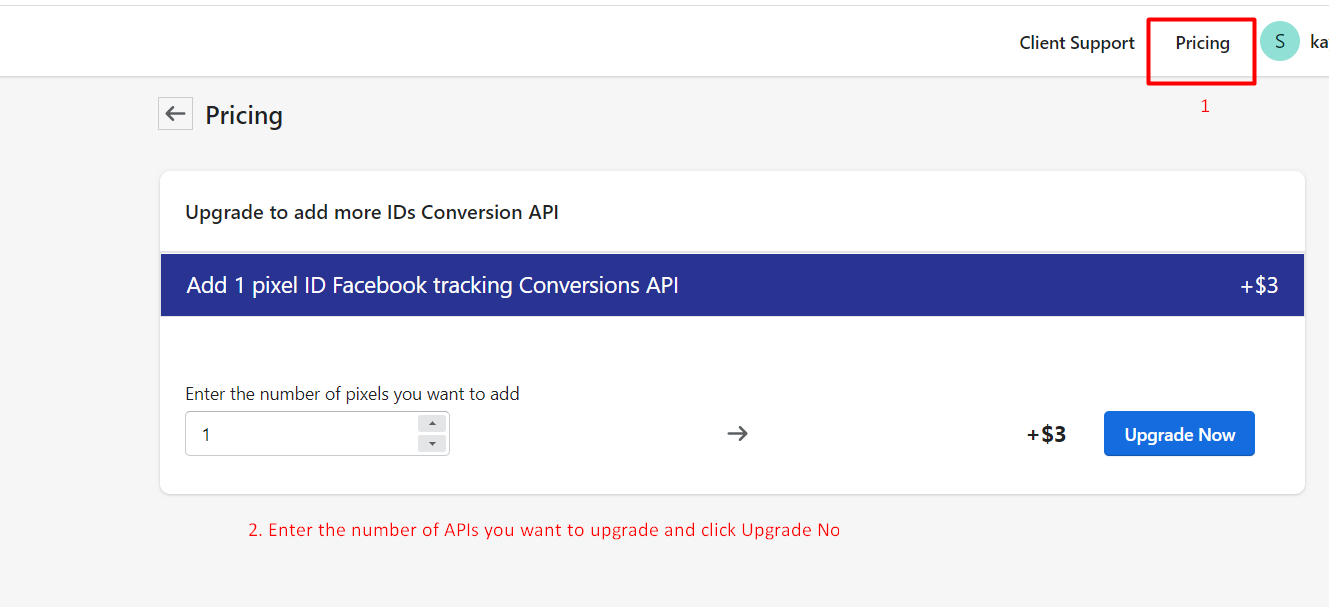
You can set up the conversion API for the second pixel as well. Be noted that the app pricing includes unlimited pixels but only 1 Conversion API.
You need to upgrade to add more APIs, the fee will be charged immediately after you click Upgrade Now, there is no trial for extra APIs.
To upgrade, go to Pricing and add the number of APIs you want to upgrade:
⭐️ App value tracking
Shopify tracks pure sales, meaning it does not include any shipping, taxes, or discounts in sales reports.
Anything other than the sale could be considered a cost or tax entry for accounting purposes.
In case you want to track the subtotal value, please contact our support team or reach us via email at
⭐️ App currency
By default, the app will send the currency that you choose on your Shopify settings, if you encounter any issues with the currency, please contact us at
⭐️ Analytics
(to be released on 28th Sept 2021, GMT +7)
Seeing a large number of queries asking about the purchase events tracking, we are planning to release the purchase report feature to show how many purchases events our app has sent to Facebook. However, please note that when Facebook reflects that information to the Facebook Manager depends on Facebook itself.
The Analytics section offers you a dashboard to check all purchase orders within the last 60 days.
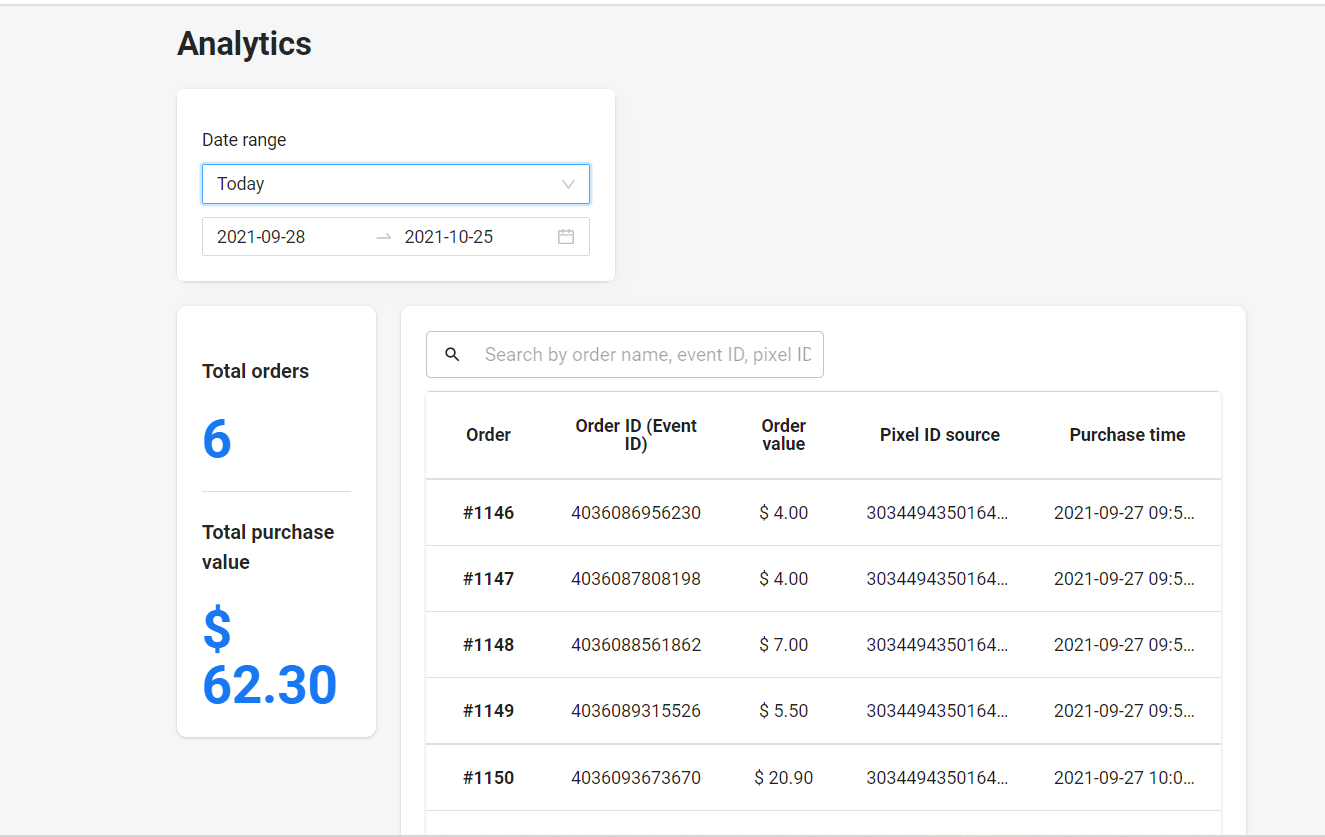
From this part, you can see the number of orders (purchases) and order information including:
- Total orders during the date range
- Total purchase value during the date range
- The order number
- Order ID or event ID
- Order value
- Which pixel ID tracking this purchase order and
- Purchase time: when the order is completed
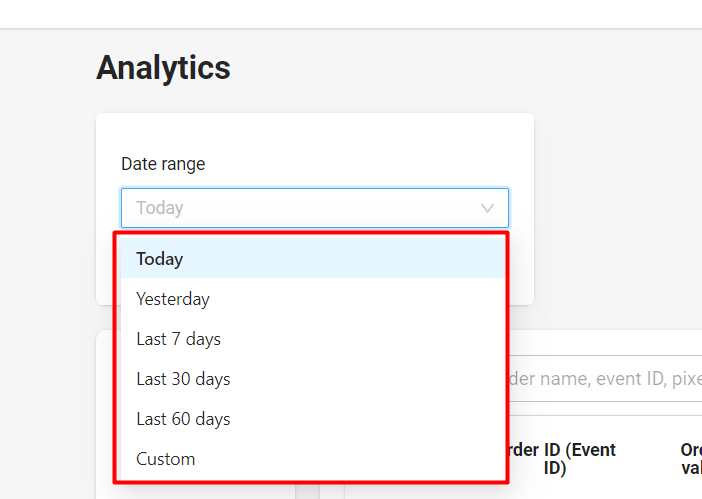
You can filter which date you want to see the event by clicking on Date range:
**Please check new features: Catalog manager and Product feed below
New feature: Product feed
If you already have the catalog and want to feed or update the product, just one click with our feed feature.
- Select the Product feed tab, you can choose the option to feed all products in your store.
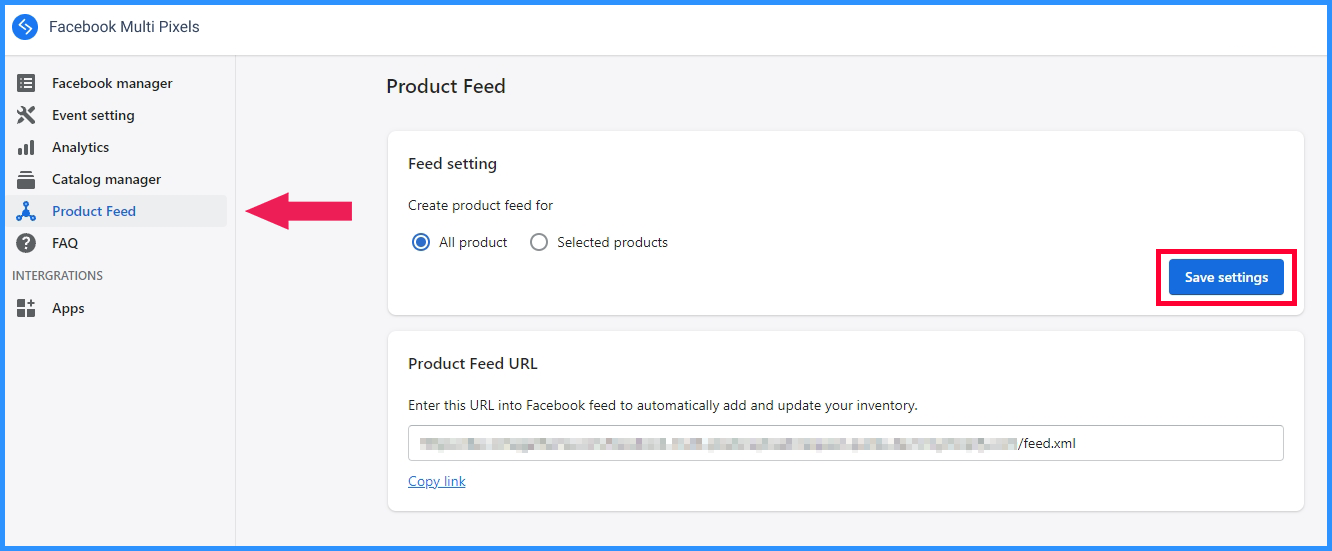
- Or you can feed products follow their collection, type, tag, or only selected products

- Copy the link feed, then go to your Facebook Commerce Manager
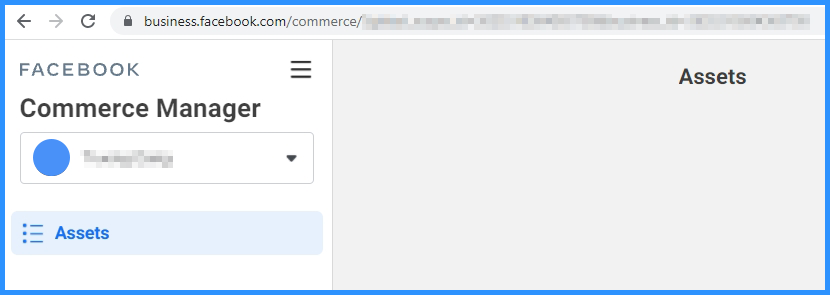
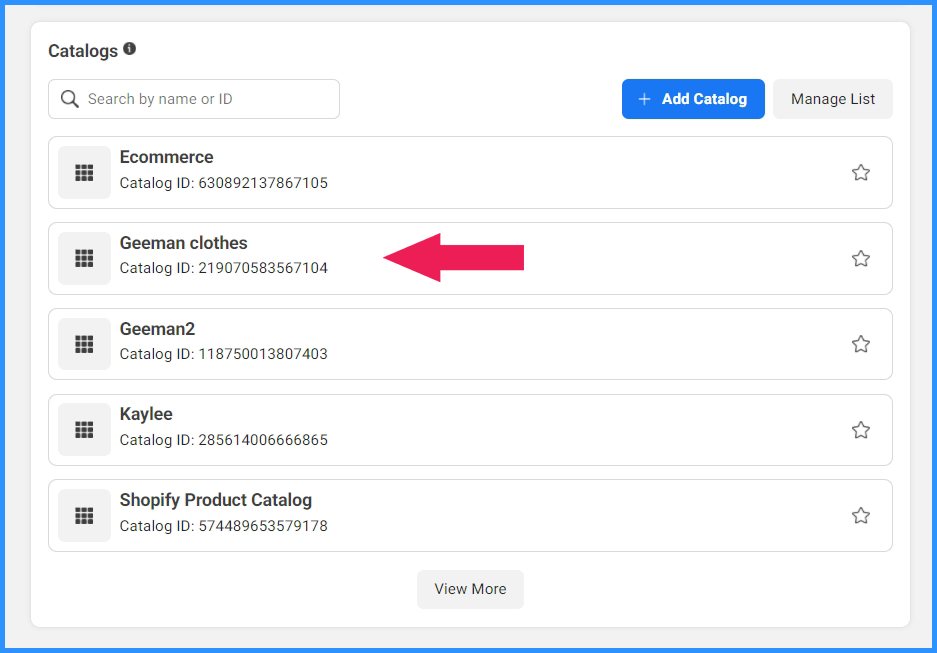
- Please select the catalog you want to feed or update the product
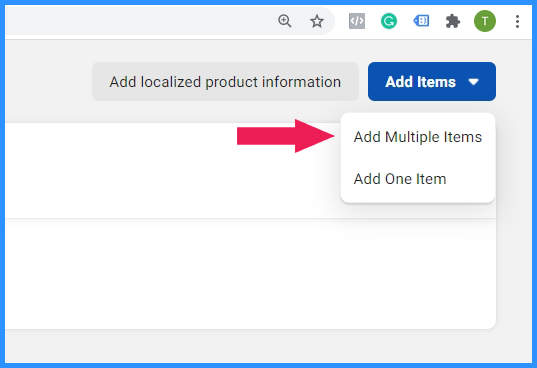
- Select Data Source to connect the new source
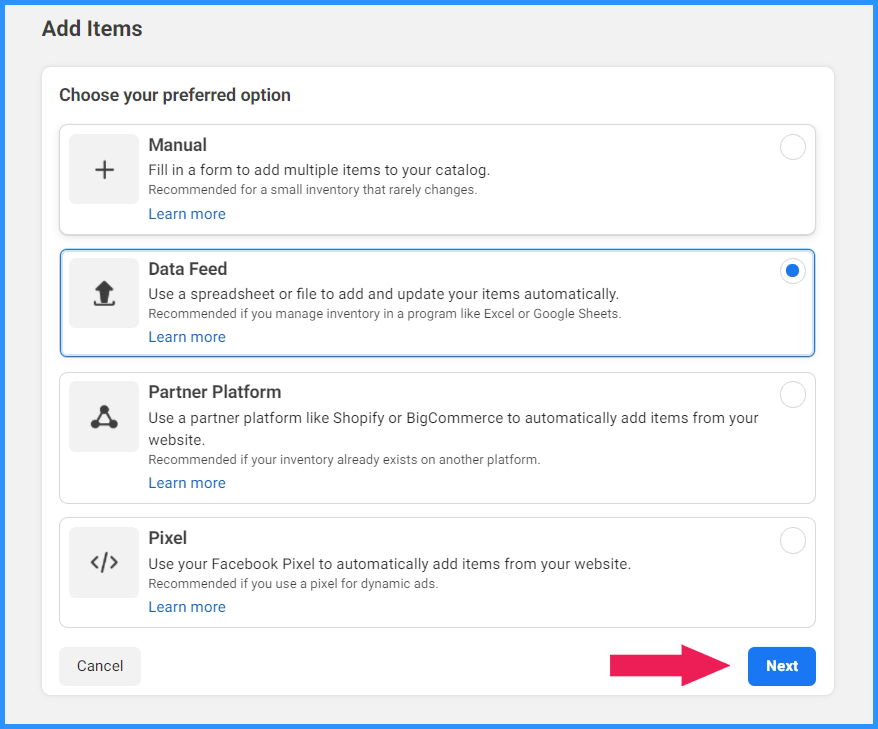
- Select the Data Feed option as feed method, then click “Next”
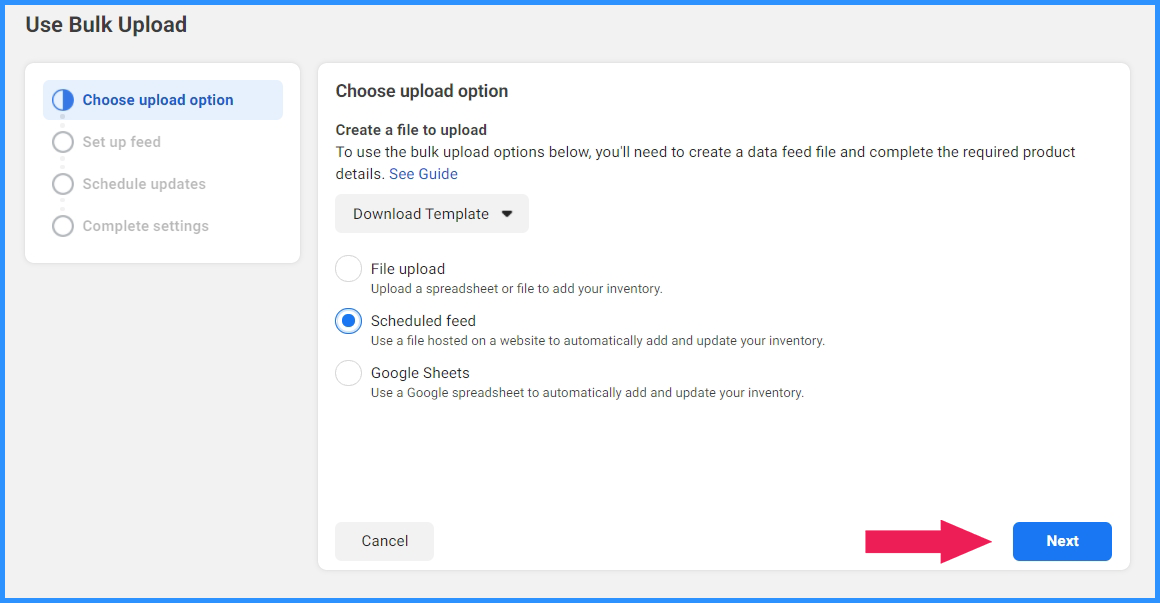
- The boarding pop up for bulk upload product appear, choose the Scheduled feed
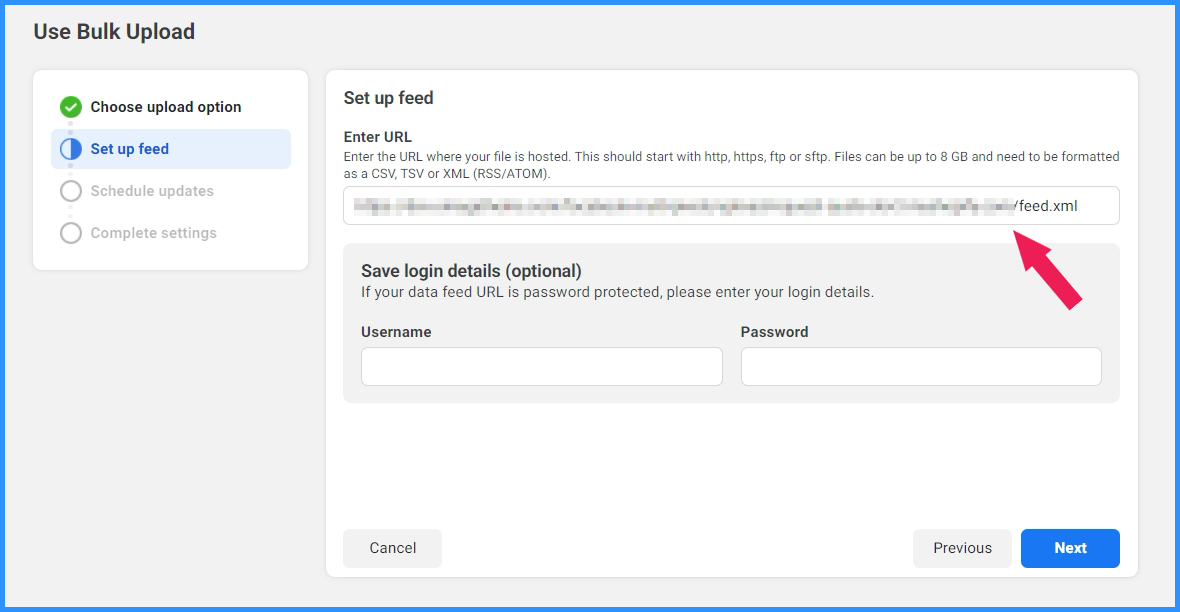
- Paste the feed link from our app (with ending feed.xml), just leave the Save login details empty (it is optional), then click Next
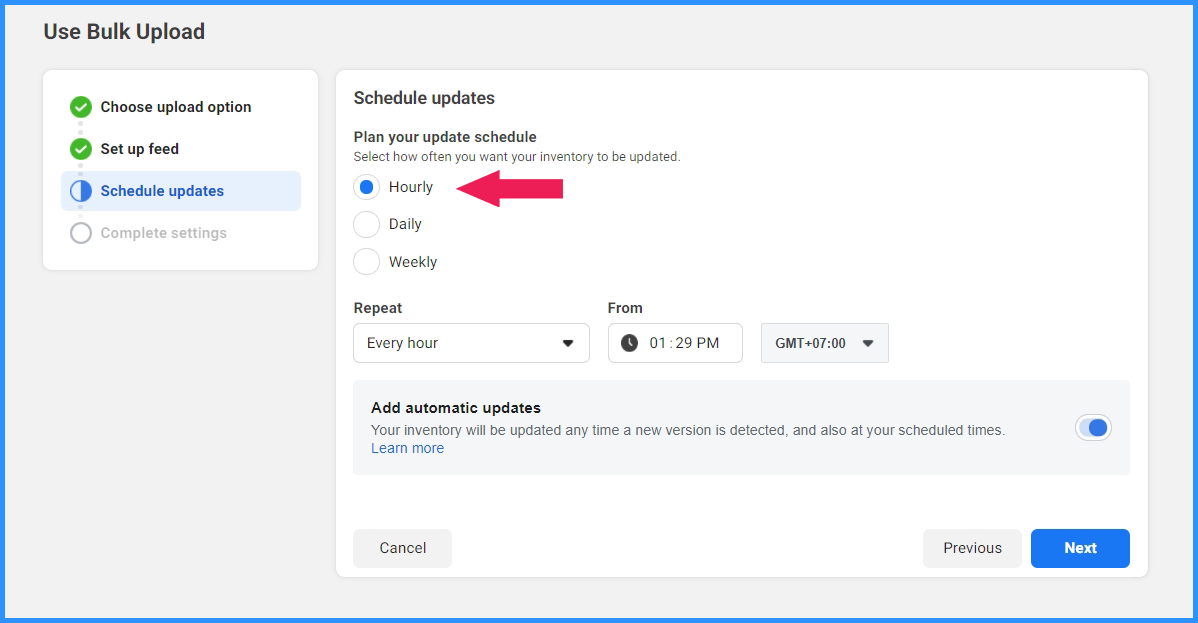
- Select the time basis you want to update your feed as hourly, daily, or weekly
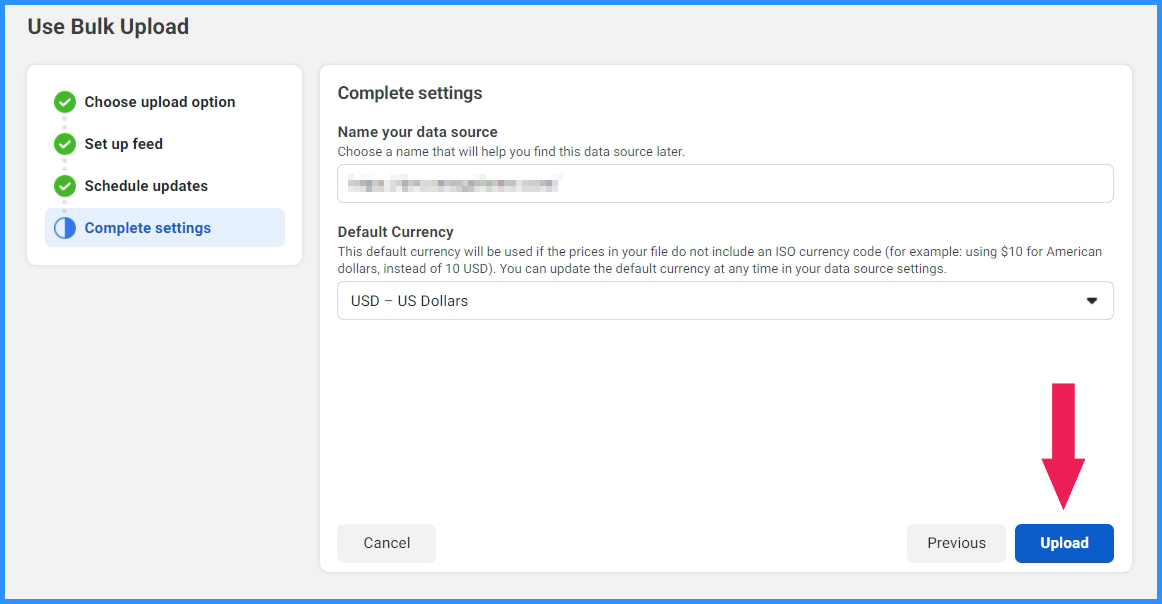
- Name the data source, then click Upload to finish the process
- After waiting for the feed update, here is the report for the process
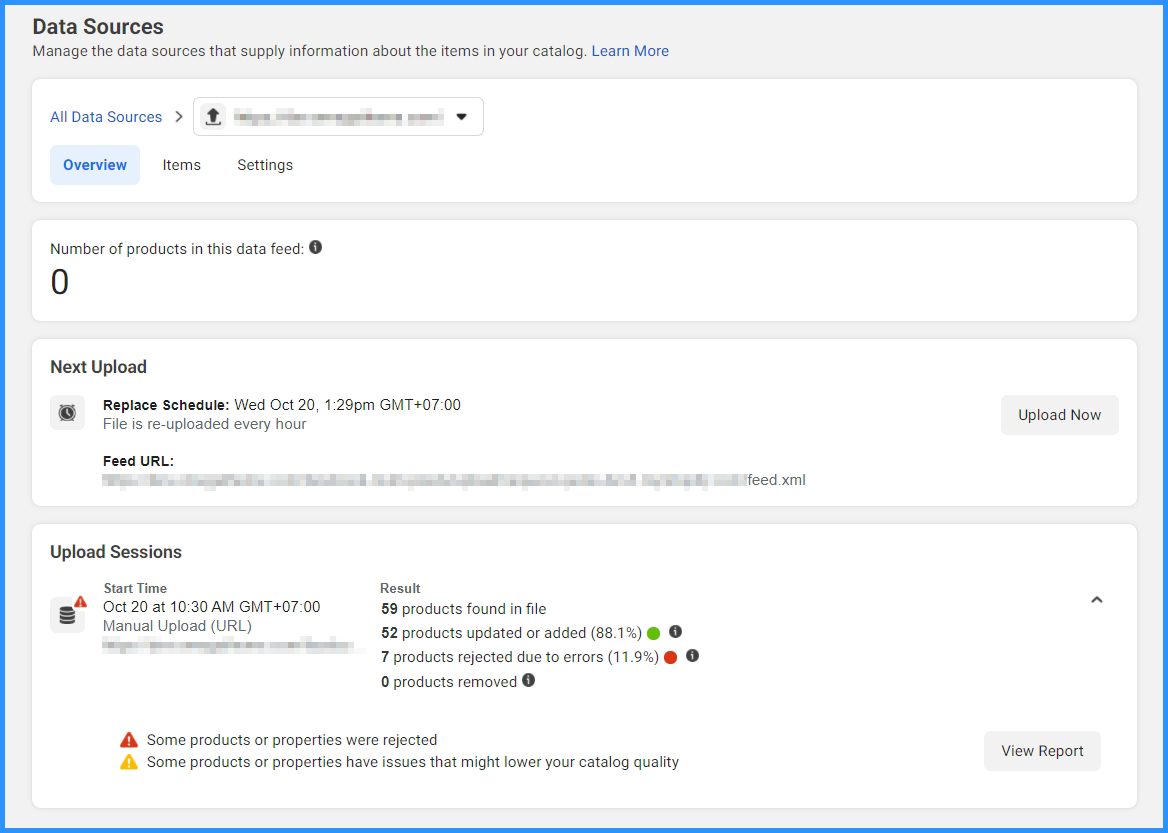
- Finally, you can go to the Items tab to check all product status
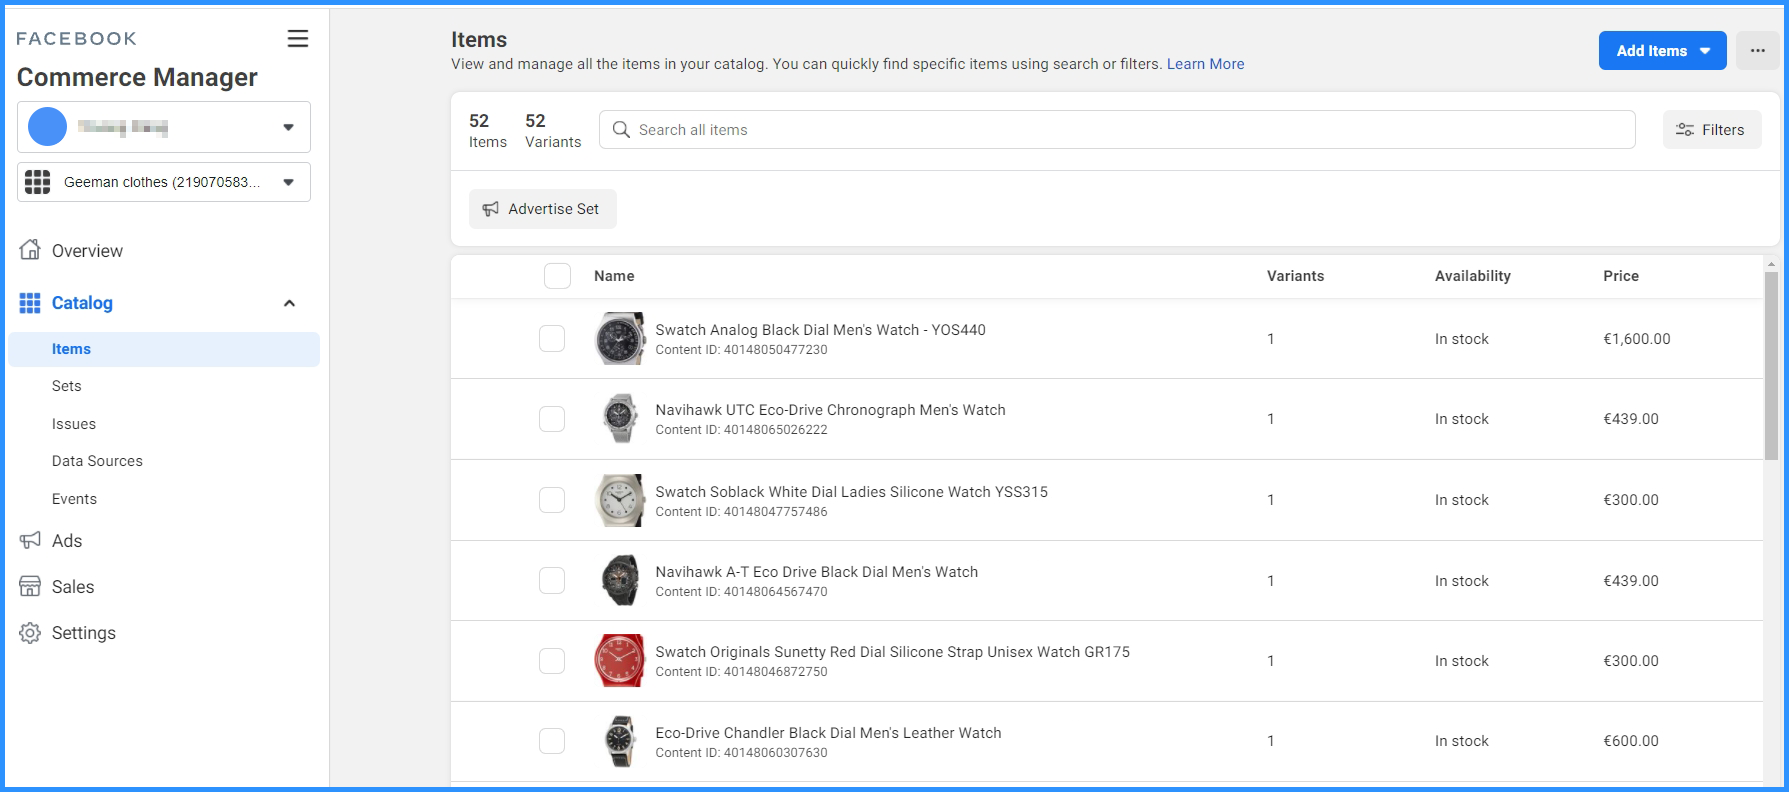
If you have any issues related to the Facebook catalog or product feed, please contact our team via This email address is being protected from spambots. You need JavaScript enabled to view it. to have technical support!
New feature: Catalog manager
First, log in to your Shopify and go to the app dashboard
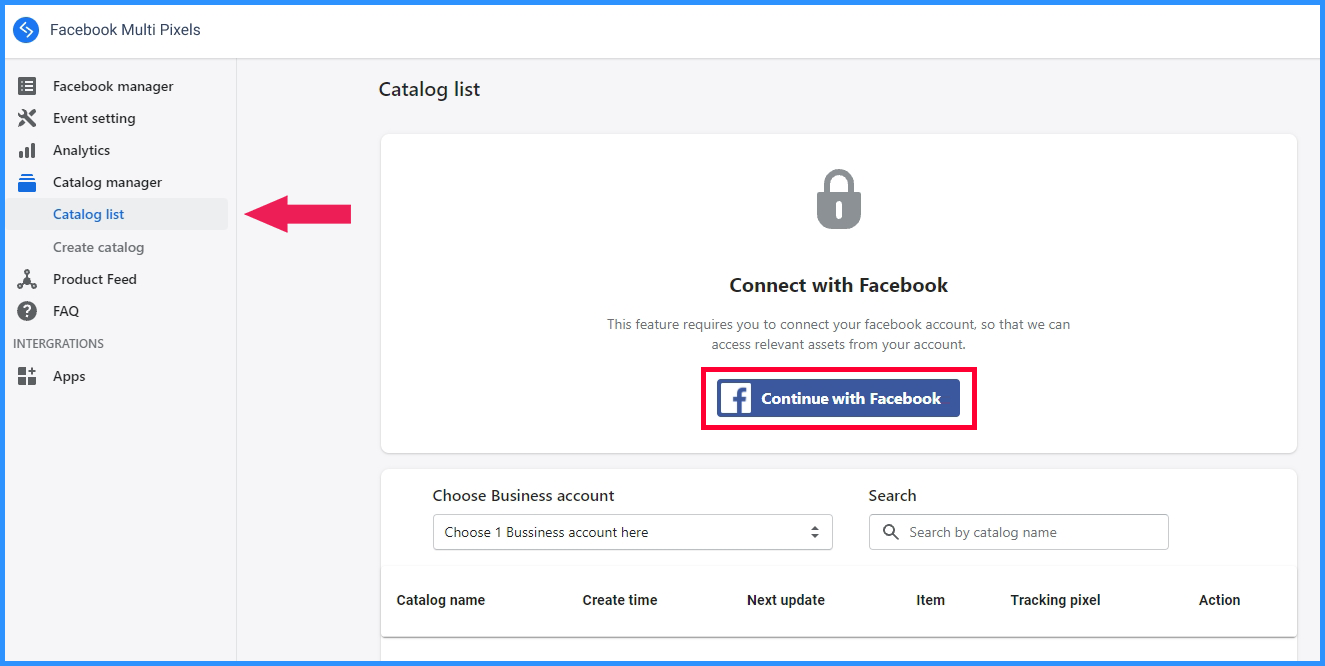
- Select the Catalog manager tab, then go Catalog list, click Continued with Facebook button
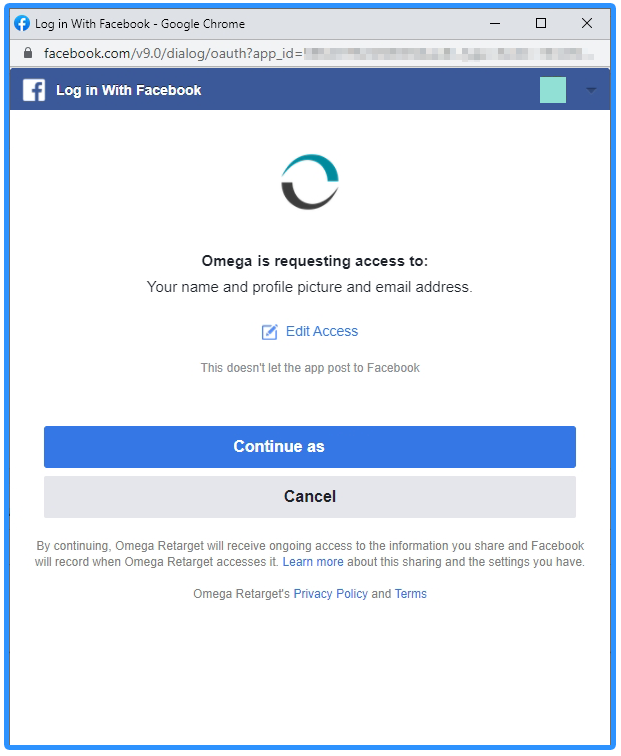
- Connect with your FB which has the Business manager admin right.
- Click the Continue as …button to grant our app access
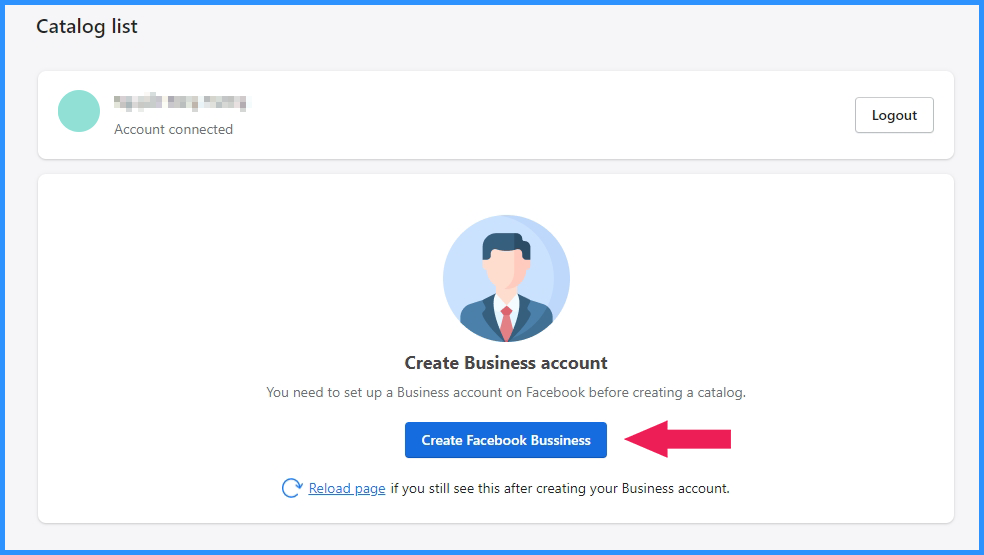
- After your Facebook account is connected, you can create a Business account if you don't have one or use the existing Business Manager
- Create a new product catalog
- Select the Create catalog tab
- Choose the business account
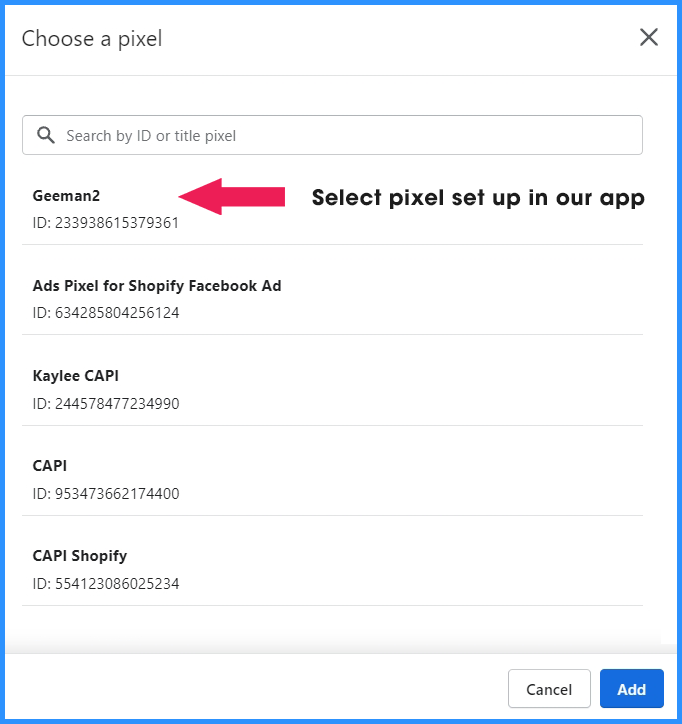
- Select Facebook pixel to connect and choose the option to feed product
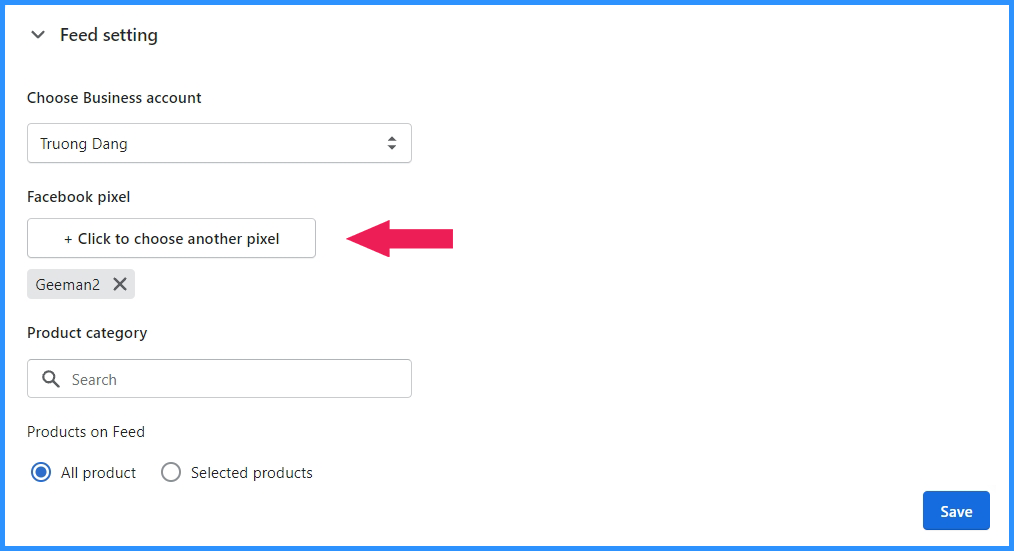
- Select the pixel ID you set up in our app. You can pair the catalog with Facebook pixel after the setup. Then click "Add" to finish the setup
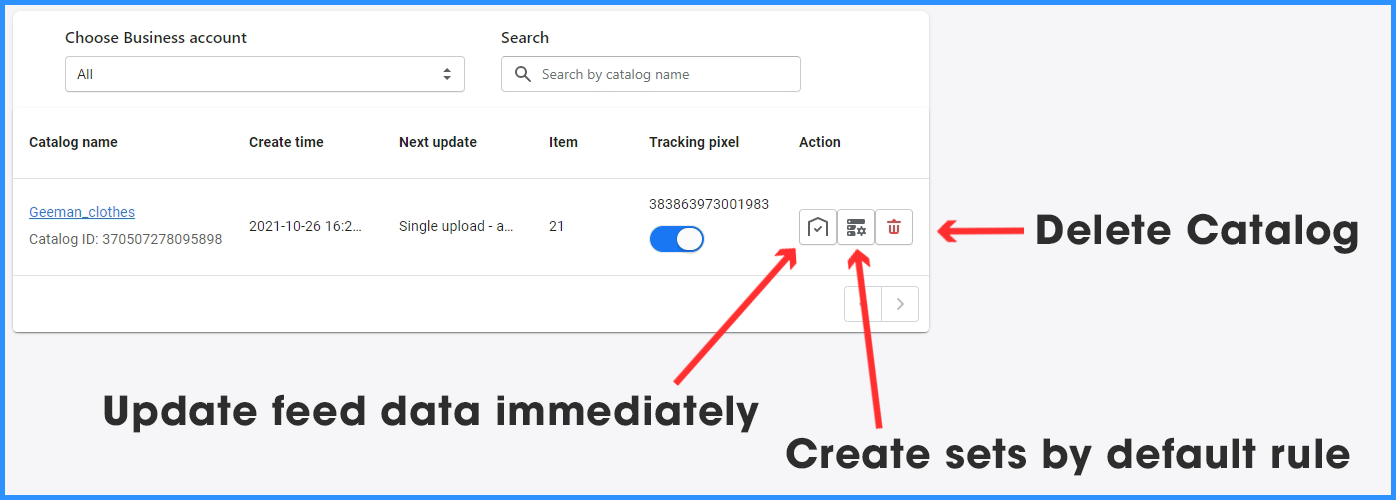
- After that, the catalog status will appear like this on the Catalog manager
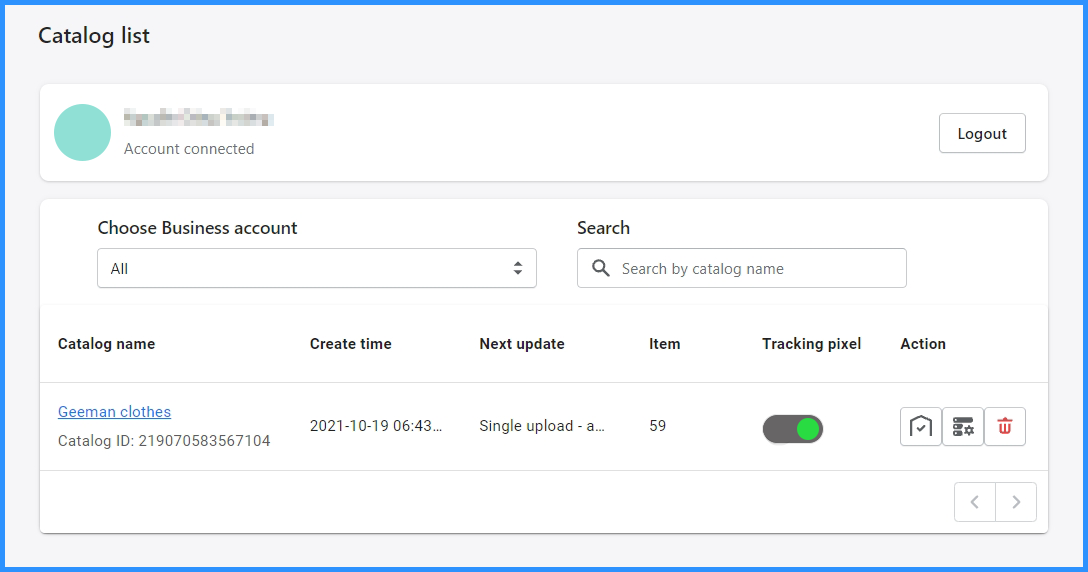
- You can update the data feed immediately with this action