IP Blocker and Country Redirect Document
Blockify ‑ Fraud IP Blocker - Setting Guide
Directly go to this link: IP Blocker & Country Redirect to install the app
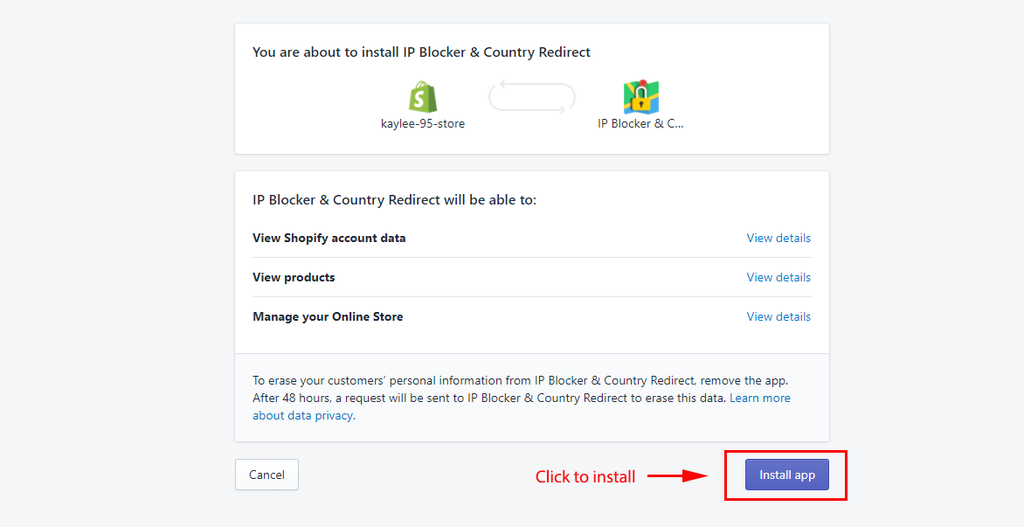
Step 1: Log in your Shopify account in App Store. Click the ADD APP button to install the app for your store.


Step 3: After press Install app, the app will be automatically installed and be ready right away for you to use in Apps section

Note: If you have finished installing but either the app does not show up in Apps section or the automatic installation failed, please contact us immediately through
⭐️ How to set up IP Blocker & Country Redirect app:
After installing IP Blocker & Country Redirect app you be directed to APP admin:

1.Add Region
Click Add Region button to add locations you want to block. A popup will appear as belowAdd Region:

Blacklist and whitelist By default settings of the app:
- Blacklist : is a list which will be blocked when someone tries logging in the your store.
- Whitelist: is a list which is acceptable to login to the page..
However, you can switch that setting if you make changes in the settings tab.

IP address:
If you block by IP address, please enter one IP address in the IP location.

City/ Country:
If you block by city/country, in the city bar, you can enter many cities, remember to add a comma between them. But you can enter only one country code to enter the case many countries own the same cities names.

Country:
If you block by country, in the country bar, you can enter many countries’ code, remember to add a comma between them.

Block/ Redirect:
The default function of the app will block all the region you added, you can change to Redirect and enter the link you want, so only the regions selected will be redirected to that link.

Import/ Export location:
After adding a region, you can see the Import location/ Export location in the Add Region tab.
If you choose Import location, you can upload the file from your device, remember to check the template file before uploading to make sure it is in the correct form.

If you choose Export location, all regions you added will be exported to excel file
You can also see the list of locations blocked, edit and delete locations or change it to blacklist or whitelist from the admin.

Click to the setting tab, you can change the settings of the app as your preference.

Block for collection: apply the app for a specific collection
Block all: Block all regions except regions in blacklist and whitelist. This function allows you to test the block feature before using.
Enable redirect without popup: the popup will show or not show depending on your setting.
Matching rule: the default setting of the app will choose Blacklist to block, you can switch to whitelist if you want to block all regions in whitelist instead of blacklist.
Title header, describe, link redirect and label submit can be changed. You just simply enter to change it.
Please remember to click the Save button to save all your settings.
Style:
The app allows you to change the style of popup to match with your store.

If you would like to customize, you can use Custom Css, however, it requires the knowledge of html and css. If you do not know about it, simply contact us to get support.
Upload images:
To change the image or background of the popup, you can access this part and change.

3. Statistic
This part reports the access from the list of regions which are blocked. Please note that our app blocks the access to the content of your store, not the traffic from these regions.
It means that you can see people from those regions visit your store, but they are unable to see the content.

If you have any problem in using Delivery Date please do not hesitate to contact us at
No questions yet.
